Storyboard a Short Video Before You Touch the Timeline
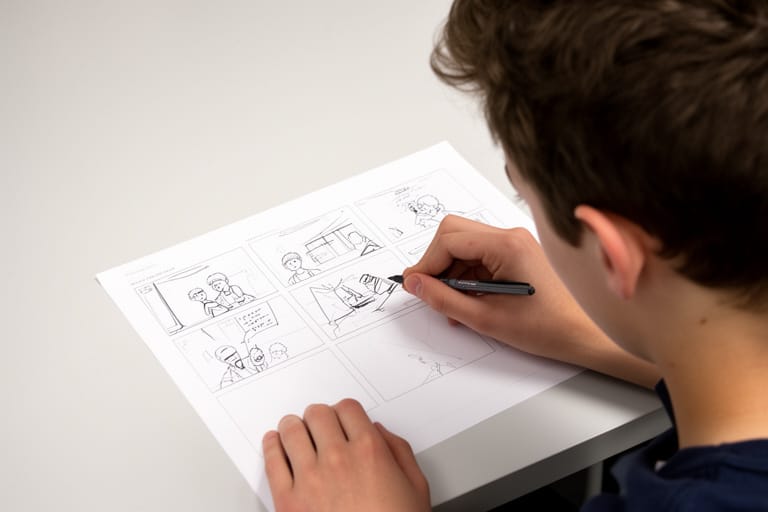
You have a sketch, a few photographs and an idea for a short video. The tempting next step is to open an editor and start arranging things. Before that, try drawing the story in a few boxes. A storyboard gives you somewhere to decide what viewers should notice, what changes and where the video ends.
You do not need impressive drawing skills. A rectangle can stand for a room, an arrow can show movement and a few words can describe a sound. This guide uses a fictional paper star travelling through three original drawn landscapes. It is a planning example, not a report of a filmed project or tested result.
Give the story one small change
Start with a sentence that explains the action. For the paper star, that sentence could be: a star leaves a quiet hillside, crosses a busy pattern and reaches an open sky. There is a beginning, a change and an ending. You can picture the sequence without explaining an entire imaginary universe.
For your own project, choose a change that fits the material you have. An object moves somewhere, a pattern becomes visible or a blank page gains a design. Write down what the final frame should show. If you keep adding new scenes, check whether they support that ending or belong in a different video.
Make three rough frames
Draw the opening, the middle and the ending on paper. Under each box, write two short notes: what is visible and what the viewer needs to understand. In the opening, the star appears on the hillside. In the middle, the crowded pattern surrounds it. In the ending, the star sits against an uncluttered sky.
Here is an original text diagram for that plan. It describes proposed frames; it is not a screenshot of a finished video or generated output.
START                       CHANGE                      END
[Star on a hillside]  -->   [Star crosses a pattern] --> [Star in an open sky]
Establish the setting        Show the transition         Hold the final image

FOR EACH FRAME: image | action | caption | sound | next cut
Add more boxes only when the story needs them. You might want a close view of the paper texture before the scene changes. Give that extra frame a specific job rather than adding it because the sequence feels short.
Choose framing that directs attention
A wide frame introduces the scene. A closer frame can highlight a shape, a texture or a small change. Use that difference deliberately. If every frame is a close view, viewers may struggle to place the object. If every frame is wide, the detail you care about might be difficult to see.
Draw a rough crop inside each storyboard box. Consider where a caption will sit and whether it covers an important part of the image. For a vertical composition, arrange the scene within a taller box from the beginning. Keep the star’s size and position intentional so a cut feels like part of the story.
Pick a production method for each frame
The simplest version could be a sequence of still drawings with captions. You control their order and how long each stays visible. This suits a story where the change comes from moving between scenes rather than movement inside an image.
Another option is recording the paper star moving across a drawn background, or photographing its position one frame at a time for an authored animation. In either case, your plan should describe the action you intend to create. Keep the camera position consistent if the background needs to stay still, and inspect each frame before assembling the sequence.
You can also mix methods. Use a static opening, an authored transition and a held ending. Write the method beside each box so you know which drawings, photographs or recordings the next stage actually requires.
Give generated motion a defined role
If you want to explore a motion idea from an original illustration, Magic Hour’s image-to-video tool offers a starting-image upload, an optional movement description and a generated clip to preview and download. In the paper-star example, an owned drawing could become a separate visual interpretation of the transition.
Keep the request focused on the frame’s purpose. Decide what should move, what should remain recognisable and where the next cut will happen. Then watch the whole preview. Check whether the star changes shape, the background gains unwanted objects or the movement makes the intended transition harder to understand.
Label a generated segment as an AI animation of an original illustration when sharing it. Keep the source drawing alongside the working files. If the interpretation does not suit your storyboard, return to the static or manually authored version. Choosing a method is part of directing the story.
Place captions and sound after the story works
Read your frames in order without sound. Can someone follow the change? A short caption may explain the setting or connect two scenes, but it should not carry a second story that competes with the images. Add captions as editable text during assembly so spelling and timing can be revised.
Sound can mark a transition or give the ending a different mood. Use audio you created or have permission to include. Keep meaningful spoken information available in captions or accompanying text. Watch the sequence on the screen where you expect to share it, paying attention to whether a viewer has time to read each line.
Finish with a small project pack
Save the storyboard, original images, audio permissions and selected exports in clearly named folders. Keep an untouched source version apart from experiments. Name the final export so you can distinguish it from the earlier drafts, and include a short description of how it was made.
Before posting, check the first frame, each transition and the ending against your original sentence. Remove anything that distracts from the change you wanted to show. A storyboard can be simple: a few boxes, a clear sequence and choices you can explain.
Contributor note: Magic Hour is a platform for creating and editing images and videos. This original article was prepared with AI assistance for Teens Wanna Know editorial review; publisher review is not claimed complete. Copyright remains with Magic Hour, with limited nonexclusive publication permission provided.
Sponsored Post